
How do I use my Vintage Polaroid 600 camera?

In today’s digital age, using a piece of analog technology can feel a little foreign. If you just scooped your very first vintage 600-style Polaroid camera (or maybe just found one in grandma’s attic) and are feeling both excited and completely lost at the same time, you are far from alone. On the flip side, perhaps you’re a seasoned Polaroid shooter who wants to learn more about what your 600 camera can do. Either way, we’ve got you covered.
Psst! This article is for the classic "box-style" vintage 600 cameras. If you have an SLR 680/690, or one of our folding SX-70 to 600 camera conversions, things will be a little different.
Choosing the Right Film Type
First things first, it’s important to make sure you’re using the correct type of film for your camera. Polaroid 600 cameras are named as such because they take - you guessed it - Polaroid 600 film. This is the only film type that is compatible with your 600-style camera, so don’t go reaching for your stash of SX-70, Spectra (RIP), or i-Type film. That’s because your camera is specifically designed to work with film that has a speed of 640 ASA. Vintage Polaroid 600 cameras do not have their own power source, which means they get their juice from the built-in batteries inside each pack of film, so you never need to fret about recharging your camera.
Here’s a good place to remind you to use fresh film.
Loading your film
- Pull the flash unit up until it clicks into place.
- Slide the latch on the side of the camera forward to open the film door.
- Insert the film pack, darkslide cover facing up.
- Close the film door until it clicks shut. Darkslide will eject automatically.
Flash vs. No Flash
Except for a few models, almost all 600 Polaroid cameras have a built-in flash.
This camera has a built-in flash: 
This Impulse camera has a built-in flash: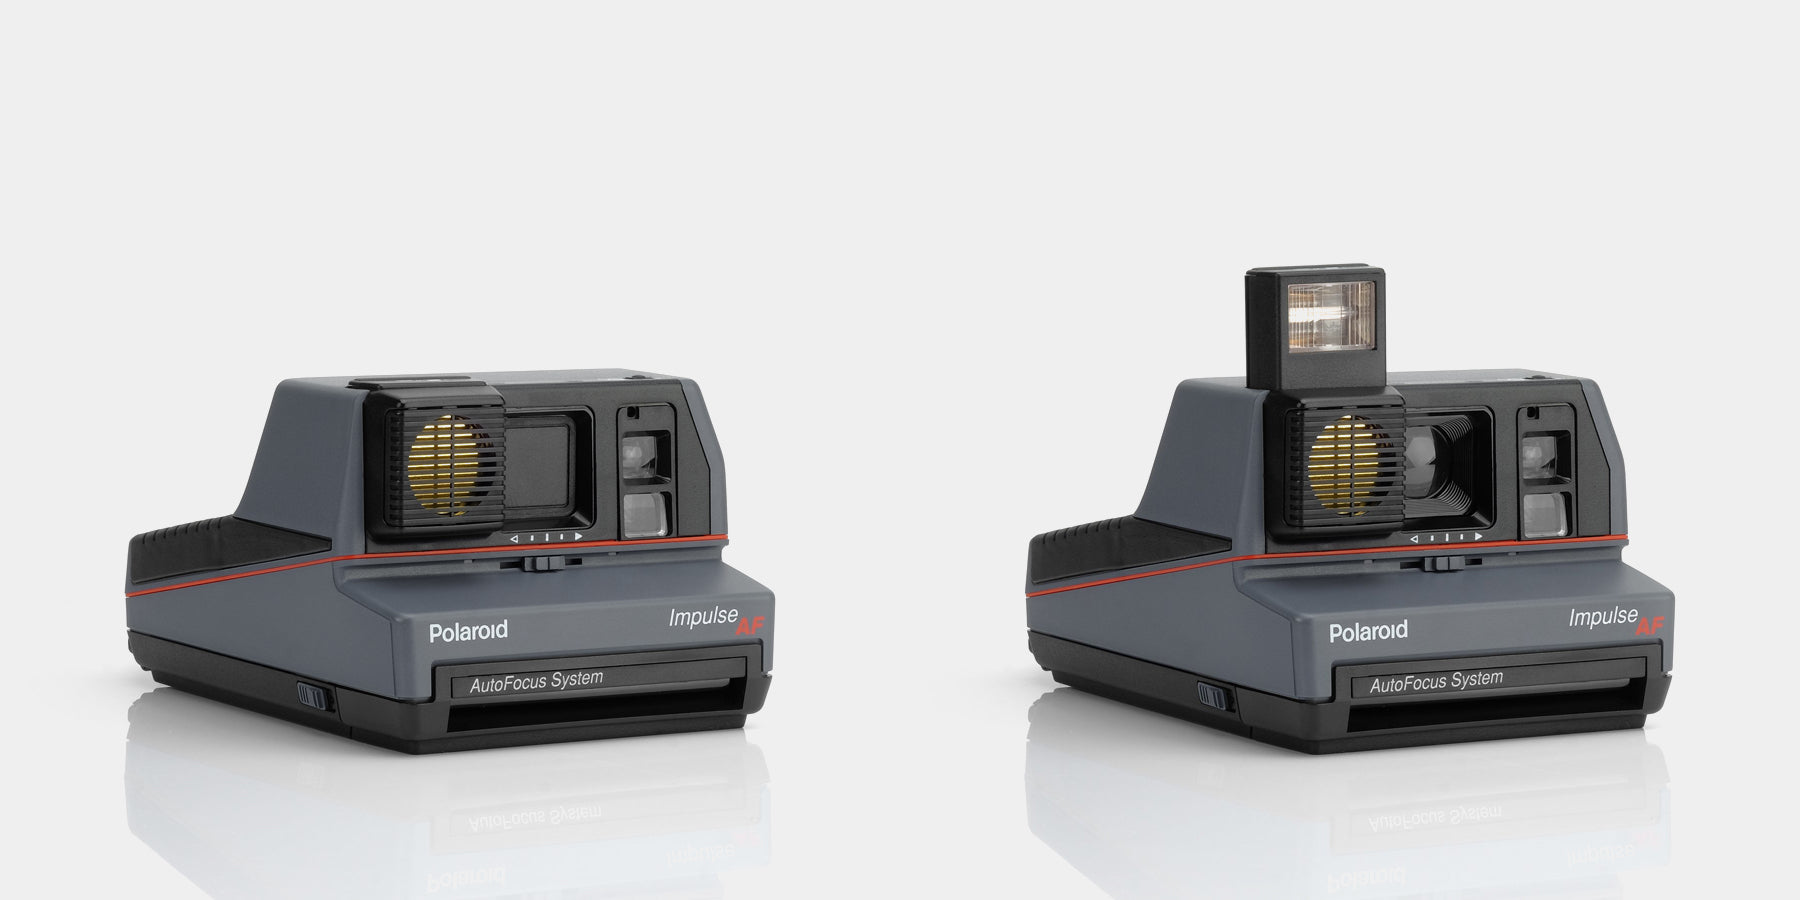
This 600 camera does not have a built-in flash:
If your 600 camera does not have a built-in flash, it is highly recommended that you use a 600 flash bar while shooting in low light settings (such as in the evening or indoors). This will help prevent your images from coming out dark, black or blurry.
Shooting without flash
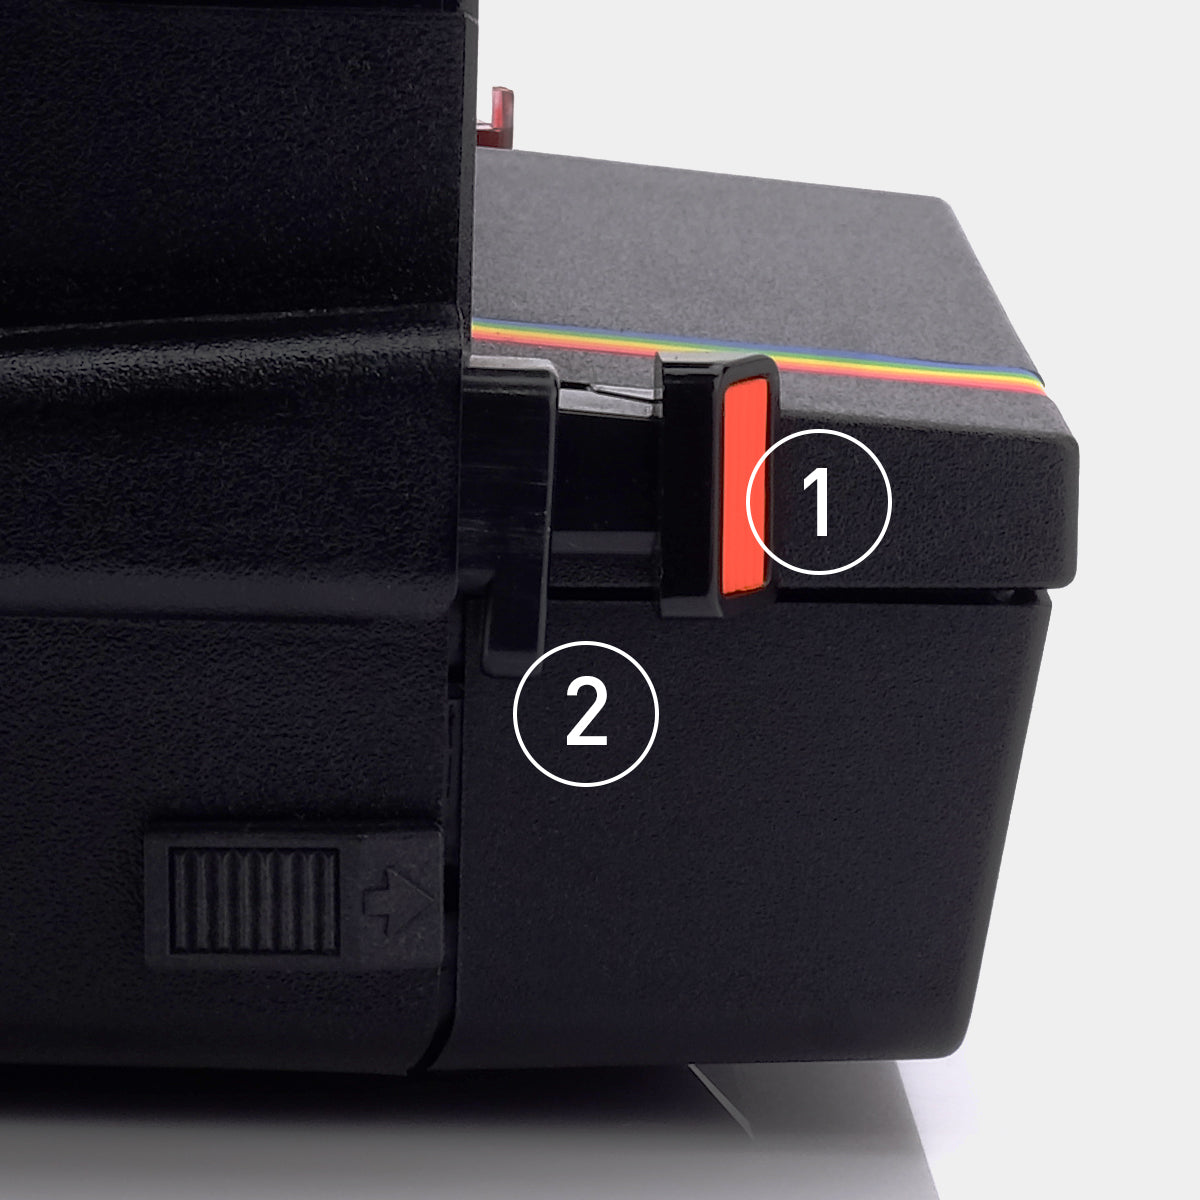
For models that have a built-in flash, most will also have a flash override button (2 below) positioned behind the main shutter button (1 below) that allows you to take photos without flash. To shoot without flash, press only the override button. Please note that some autofocus 600 models have the override button but do not have a functioning flash override feature and therefore will still flash every time.
It’s important to note 600 film and cameras are designed to be used with flash in the vast majority of situations. Limited situations when you may not want to use flash would be when taking a picture through glass or into a mirror, as the flash will reflect back into the lens, or if you are outdoors in bright sunlight.
The longest possible shutter speed on a 600-type camera is 1/3 of a second. The camera adjusts shutter speed automatically based on the light it senses. That means that if you try to take a non-flash photo inside or in low light, you will probably get a very dark or all black photo because the shutter cannot be left open long enough for a proper exposure. If you do get an image from a long exposure it may be blurry, as it’s difficult for most people to remain still long enough. Your camera is not broken; it's simply not designed for long exposure photography. Using flash in most, if not all, situations will go a long way in preventing these types of issues.
How to Charge Your Camera’s Built-In Flash
There are a few different variations of built-in flashes on Polaroid 600 cameras. Your camera’s flash might start charging automatically once you insert a film pack, or you may have to manually charge the flash yourself after each shot. You can tell which category your camera falls into by inspecting the number of LEDs present on your camera — zero, one, or two LEDs.
600 cameras with one or two LEDs will charge automatically.
- Make sure your camera is ready to shoot by lifting up the flash unit to reveal the “face” of your camera, or, for Impulse cameras, by gently pressing down on the top of the flash unit; this should cause the flash unit to pop up. The built-in flash will not charge if your camera is closed.
- Polaroid 600 cameras are powered by the batteries within each film pack, which means the flash will not work unless it’s loaded with film.
-
One LED - Your camera’s flash is charged and ready to use once the LED lights up green (the green light may be solid or flickering slightly - both are okay and signal that the flash is ready to use).
Two LEDs - The red LED will light up while the flash is in the process of charging. When your camera’s flash is ready to use, the red light will turn off and the green LED will light up (the green light may be solid or flickering slightly - both are okay and signal that the flash is ready to use).

600 cameras with no LEDs present will have to be manually charged every time you want to take a photo with flash.
- Make sure your camera is ready to shoot by lifting up the flash unit to reveal the “face” of your camera. You will not be able to charge the built-in flash if your camera is closed.
- Polaroid 600 cameras are powered by the batteries within each film pack, which means the flash will not work unless it’s loaded with film.
- Hold the front trigger button down only halfway to begin manually charging your camera’s flash. You must continuously hold the button down halfway until your camera’s flash is fully charged.
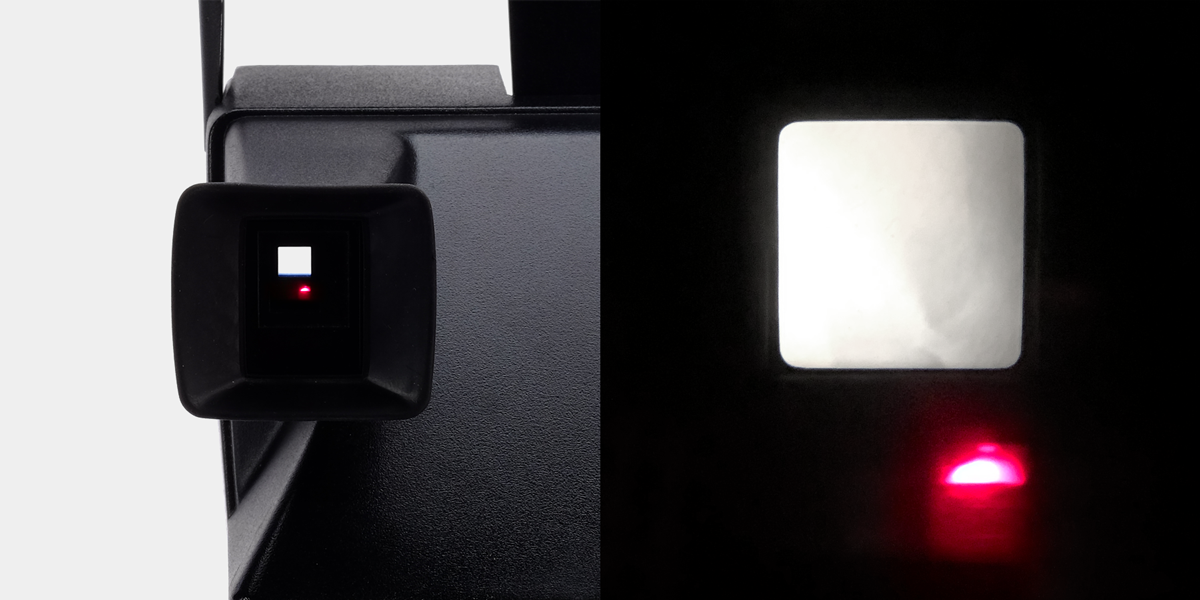
- To determine when the flash is ready to use, look through the viewfinder while charging your camera - you should see a red LED towards the bottom of your field of vision. Once this red LED turns off, the built-in flash is ready to use. [Note from the expert: Sometimes, if your camera has not been used in a while, the first charge may take what seems like a long time. The surge capacitor inside needs to reach full charge before the camera is ready to flash, and that can take longer if it is starting from nothing. Subsequent shots should need less recycle time!]
Adjusting the Exposure Slider
The small sliding control underneath the lens can be an unassuming cause of anxiety, but it’s not as complicated as it may first seem. Sometimes it will be arrows, sometimes it may be a gradient or other graphic, but it always functions the same — push the slider to the black side and the photo gets darker, push it the other way and the photo gets lighter.
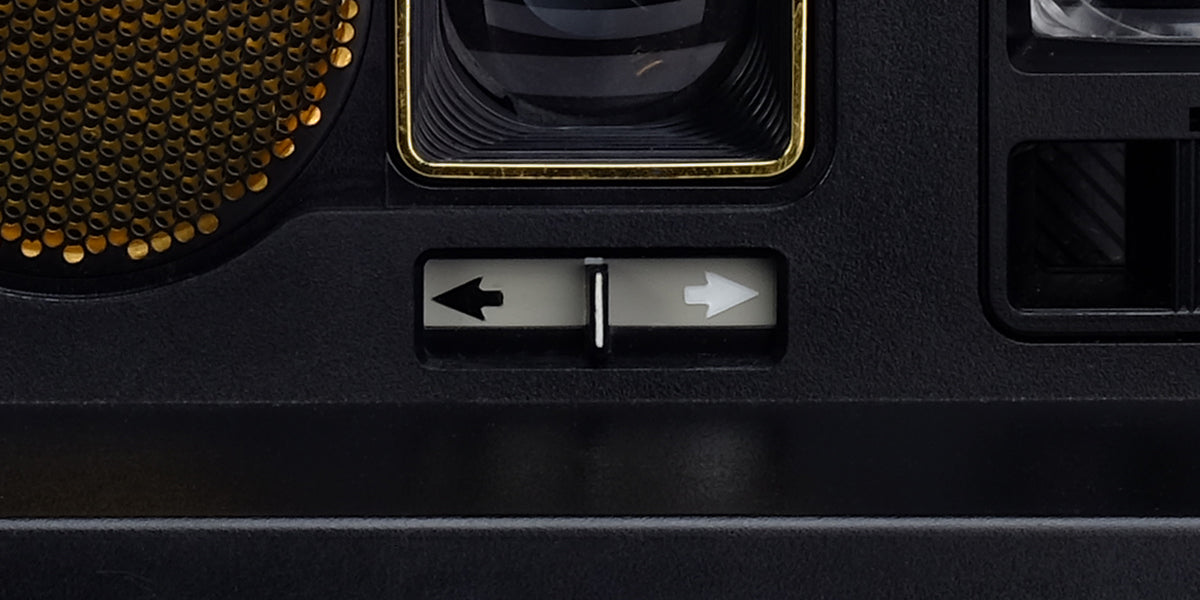
But when do you adjust it? The good thing is, Polaroid wanted the 600 camera to be as simple to use as possible. Much like the flash, the exposure system was designed to work best in the vast majority of situations without any adjustment at all (centered). Most of the time you should be able to just leave it in the center, but it may be helpful in situations where your lighting is extreme.
How to Take a Photo
Now that you know which film your camera takes and how to charge its built-in flash, let’s get shooting.
- Look through the camera’s viewfinder to frame your shot before firing. Things can get a little blurry if photographed too close, so stay at least 4 feet away from your subject to get a clear picture. Also, make sure your hand is not covering the film ejection slot in the front of the camera.
- Once you are ready, fully depress the camera’s main trigger button to take a photo with flash (or depress the flash override trigger to take a photo without flash — note that some autofocus 600 models do not have a functioning flash override feature).
- Voilà! Your image should now eject. Most vintage-style cameras will have a black film shield to protect your photos from light when they first eject from the camera. They come in one of two styles: short or long. Older, short film shields will retract automatically once the photo fully ejects, while longer ones will stay in place until released by the user for maximum protection. If your camera has a long shield, be careful not to rip it out. Lift it gently and allow it to retract into the camera before removing your photo. [Note: As they're better for the development process, all vintage cameras refurbished by Retrospekt have long film shields installed.]
- For best results, shield your freshly-exposed image from the light by safely tucking it away in your pocket or camera bag, flipping the image over, etc. And remember: don’t shake it! These steps help protect your image during its most sensitive stage of development and ensures better contrast and color integrity.
Still have questions on how to use your 600 Polaroid camera? We’re here for you. Email service@retrospekt.com to get in touch with a real human being that would love to help you out.
Don’t have your very own vintage 600 camera to try these tips out on? Check out our available stock of cameras here.
Happy shooting!

By Haley Miller
Head of Operations | Retrospekt
Haley was initially hired as a Refurb Technician back in 2016. Although she has handled thousands of Polaroid cameras over the years, these days you'll probably find her in front of a computer screen answering wholesale inquiries or enjoying a good spreadsheet. (She'll still jump at the first opportunity to refurb a camera, though!)